Creating Assets
By default assets are created by ingests, watch folder imports, or import processes in Asset Management. You can also create new assets in the Asset Management database manually from the Browse app. The asset you create is a “placeholder” asset: It contains metadata but it does not contain any essence, such as a video or audio file. Upload the essence file to the new asset in a subsequent procedure.
-
If you create the asset from the top-level folder (“root folder”), no reference to the new asset is created in the folder. You can search for the new asset in the Search app and upload essence files from there.
-
If you create the asset from any folder below the top-level folder, this action additionally creates a reference to the asset in the selected folder. You can directly select the new asset in the Browse app folder and upload essence files.
As an alternative, you can create a placeholder asset by uploading a metadata file in AXF format (*.axf), which was exported from an Asset Management system, in the Tasks app. The type of the new asset is determined by the asset type specified in the AXF file. You can search for the new asset in the Search app and upload essence files from there.
Note the following limitations:
-
You can create assets only if you have the proper permissions in Asset Management (you must have the CBA creation right granted for at least one asset type).
-
The folder configuration in Asset Management must allow creating assets.
-
Your ability to upload files depends on Asset Management user privileges and rules.
To create a placeholder asset in the Browse app:
-
Select a folder.
-
Do one of the following:
-
Right-click and select Create Asset.
-
Click the App Menu button and select Create Asset.
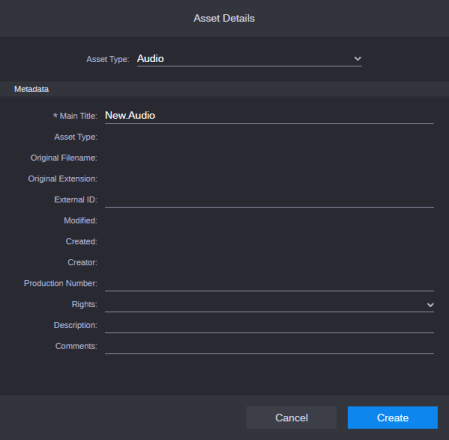
The Asset Details dialog box opens.

-
-
Select the type of the asset to be created from the Asset Type list. The list shows all asset types that you are allowed to work with.
The fields of the metadata template configured for the selected asset type are shown.
n If you have already entered data on the template and then select another asset type, the previously entered data is lost when the new template opens.
-
Type the main title for the new asset in the Main Title field.
If you do not provide a main title, a new asset is created with the name New.<asset type>. If there is already an asset named New.<asset type>, a .01 extension is appended to the asset name, and incremented for each unnamed new asset (New.<asset type>.02, and so on).
-
(Optional) Supply optional information in the Asset Details dialog box. For information on the different types of metadata fields that you might encounter, see Understanding Asset Management Metadata.
-
Click Create to create the asset and keep the Asset Details dialog box open. This allows you to continue creating assets.
The asset is created in the Asset Management database.
-
If not created from the top-level folder, an “asset created successfully” message opens. A reference to the new asset is created in the selected folder. The folder is updated and shows the new asset reference.
-
If created from the top-level folder, the asset is created but no reference is added to any folder. A misleading "The asset cannot be created" error message opens. Click in any area of the UI to close the error message.
-
-
(Optional) Create additional assets.
-
Click Cancel to close the Assets Details dialog box.
The asset you created is a “placeholder” asset: It contains metadata, but it does not contain any essence, such as a video or audio file. Upload the essence file to the new asset.
To create an asset by metadata upload from the Tasks app:
-
Open the Tasks app.
-
Click the App Menu button and select Create Process.
-
(Option) Select the Asset Management system on which the process is to be created.
-
Select Upload Metadata.
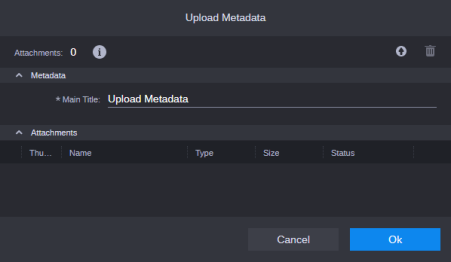
The Upload Metadata process creation dialog box opens.

-
Do one of the following:
-
Click the Upload button in the process dialog box and double-click the AXF file to be uploaded in the Open dialog box.
-
Open the Explorer (Windows) or Finder (macOS), select the file and drag it to the process dialog box.
The drop zone is outlined in blue and a Move icon indicates if dropping is possible.
An asset card shows the file name, file size, and the upload status.
-
-
Provide a name for the process instance in the Main Title field. If you do not provide a title, the default title “Upload Metadata” is shown as the process title in the Process app.
-
Click OK to close the Upload Metadata dialog box and start the AXF upload process.
-
(Optional) Open the Process app and monitor the progress of the Upload Metadata process and its subprocess Import Metadata.
When the Upload and Import Metadata processes are finished, the metadata asset is created. Upload an essence file to the new asset.