User Settings for Working with Media
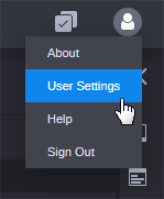
There are several user settings for working with media, which are listed in the Video/Audio section of the User Settings dialog box. Click the User Profile button on the right side of the Fast Bar and select User Settings.

Selecting the Aspect Ratio
MediaCentral Cloud UX automatically sizes the Media Viewer for the asset you select to play. If necessary, you can change the aspect ratio in the User Settings.
To select the aspect ratio of the Media Viewer:
-
Click the User Profile button on the right side of the Fast Bar and select User Settings.
The User Settings dialog box opens.
-
In the navigation panel, select the settings group Video / Audio.
-
Click the desired aspect ratio: 16:9 or 4:3.
-
Click Save.
Selecting the Playback Quality
When you play media in MediaCentral Cloud UX, you are viewing media that is compressed for optimum viewing over a network. Instead of viewing source media in its native format, the MediaCentral server compresses it on demand for network-based playback.
You have the option of playing media using one of three quality options: good, better, best. Your choice is usually based on the network connection between you and the server. If your computer is connected to the MediaCentral playback server on a local network, you can choose best quality. If your computer is connected to the MediaCentral server over a WAN (Wide Area Network), you might need to choose good quality. Good quality consumes less bandwidth at the expense of image quality.
To select the playback quality of the compressed media:
-
Click the User Profile button on the right side of the Fast Bar and select User Settings.
The User Settings dialog box opens.
-
In the navigation panel, select the settings group Video / Audio.
-
In the Quality section, select the level you want.
The numbers associated with each level indicate the percentage of JPEG compression.
-
Click Save.
Adjusting for Playback Latency
MediaCentral Cloud UX automatically adjusts to avoid pauses in playback (latency). By default, the player uses a small buffer and increases the size if the connection is interrupted or slow. The initial size is 200 milliseconds (ms), which provides very fast response when using J-K-L keys with a GigE network connection.
If you find an unusual amount of latency, such as when using a remote wireless connection, you can adjust the size of the buffer to improve the playback. Select the level of latency to improve it. For example, if the latency is high (a lot of pausing or slow response from control keys), select High.
To adjust for playback latency:
-
Click the User Profile button on the right side of the Fast Bar and select User Settings.
The User Settings dialog box opens.
-
In the navigation panel, select the settings group Video/Audio.
-
In the Latency section, select the level you want.
-
Auto: The player automatically adjusts the buffer size (the default).
-
Low: The player uses a small buffer (200 ms).
-
Medium: The player uses a medium-sized buffer (800 ms).
-
High: The player uses a large buffer (2 seconds).
-
-
Click Save.