Applying Filters from the Process Sidebar
The controls of the sidebar's Filter tab enable you to limit the number of displayed processes based on commonly used criteria. These filters are paired with non-customizable modifiers. For example, the Created filter includes a set of predefined, non-modifiable date ranges. Using the sidebar's Filter tab you can apply the following filters to the processes shown in the Process List:
-
You can filter the processes by creation date ranges.
The Created filter includes different types such as Today and Last 24 hours. While the Last 24 hours filter displays processes for a 24 hour period, the Today filter displays only those processes created between 12:00am and the current time. You should note that these filters respect the time zone of the local client. This means that if you are working with a coworker in a different time zone, their filtered processes list might be different than yours.
n Depending on the status of the Archived toggle (show active processes or show archived processes), different filters are shown.
-
You can filter the processes by process groups.
-
You can apply a life cycle-based filter.
The life cycle-based filter is also available in the toolbar. Both filters are synchronized: when you select a life-cycle status in the sidebar's Filter tab, the corresponding life-cycle icon is automatically selected in the toolbar.
-
You can apply a system-based filter. This filter includes, for example, the Media Analytics Engine (Media Analytics), Platform Automation (Automation), and Platform Storage Connectors (Storage).
-
You can filter the processes by the user who created the process. The filter is only visible for administrators and members of a group with enabled Master of Jobs entitlement.
-
You can filter the processes by its type (Job Kind).
-
<Custom property filters>: Up to 25 custom properties can be configured to show up as filter options in the Process sidebar. If the custom property is empty for all existing jobs, it will not be shown as filter option.
All filters are cumulative. For example, if you apply a life cycle-based filter and then a group-based filter, the grouped-based filter is applied to the already filtered Processes List.
n Since processes are archived after a configurable time span (48 hours by default) some of the creation date range filters, especially in combination with a life cycle-based filter, might deliver no results. See Viewing Archived Processes .
The sidebar can display up to 10 entries for each filter category by default. In some cases, the app might display a “show more” or “show all” button that allows you to select from additional filter options:
-
Groups and Creator: Click the "show all" button to open a break-out window that displays all possible filters for the category.
-
<Custom property filters>: Click the “show <number> more” link that allows you to expand the category directly within the sidebar and show all entries. Once expanded, the link turns to "show less"; clicking on it shows only 10 entries for the category again.
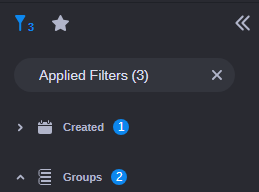
When you apply a filter, the Filter button in the sidebar header and the Applied Filters button are both updated to reflect the total number of applied filters. If you select any filters within a category, a counter appears to the right of the name to identify the number of filters within this category.
To apply a creation-time filter:
-
Open the sidebar's Filter tab.
-
Click the Expand / Collapse toggle button of the Created filter.
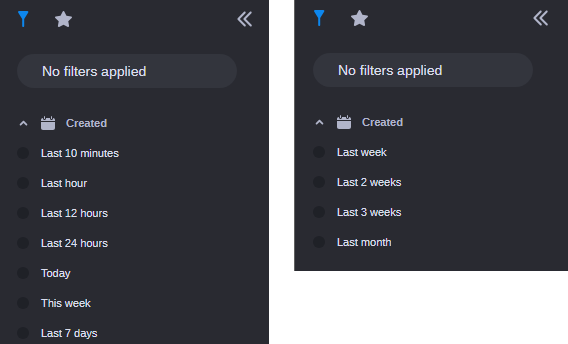
A set of predefined, non-modifiable date ranges is shown.
-
In Active processes mode: Last 10 minutes, Last hour, Last 12 hours, Last 24 hours, Today, This week (Monday through today) and Last 7 days.
-
In Archived processes mode: Last week, Last 2 weeks, Last 3 weeks and Last month.
No date range is selected by default.
The left illustration shows the filters when the Active processes mode is enabled (default), the right illustration the filters in Archived processes mode (only available for administrators).
-
-
Select one of the date ranges.
The Process List is updated and shows only the processes that have been created during the selected time range.
To apply a process group filter:
-
Open the sidebar's Filter tab.
-
Click the Expand / Collapse toggle button of the Groups filter.
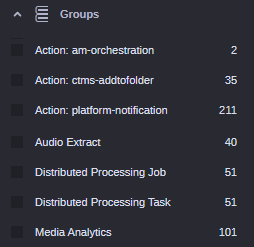
Up to 10 groups of processes that are currently being processed in MediaCentral Cloud UX are shown. The process groups are listed in alphabetical order. No entry is selected by default. The number to the right of each filter indicates how many processes match this filter.
-
Do one of the following:
-
Select the process groups you want to display in the Process List.
-
Click the "show all" button, and in the break-out window that opens select the process groups you want to display and click the Apply button.
The Process List is updated and shows only the processes of the selected groups; all other process groups are hidden.
-
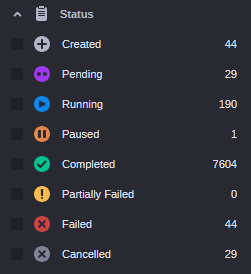
To apply a life-cycle filter:
-
Open the sidebar's Filter tab.
-
Click the Expand / Collapse toggle button of the Status filter.
No states are selected by default. The number to the right of each filter indicates how many processes match this filter.
-
Select the check box(es) of the life-cycle state(s) you want to display; processes with other life-cycle states will be hidden.
The Process List is updated and shows only the processes that are in the selected life-cycle state(s).
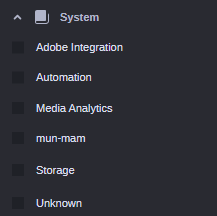
To apply a system filter:
-
Open the sidebar's Filter tab.
-
Click the Expand / Collapse toggle button of the System filter.
All connected systems and engines that support the System filter and on/by which processes are being processed are displayed, as shown in the following example. No system is selected by default.
-
Do one of the following:
-
Select the check box(es) of the system(s)/engine(s) whose processes you want to display; processes created on other systems will be hidden.
-
Select the Unknown check box to show only processes of systems that do not support the System filter.
The Process List is updated and shows only the processes of the selected system(s)/engine(s) or processes from all systems that do not support the System filter.
-
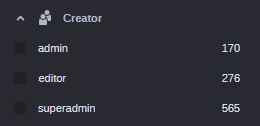
To apply a creator filter:
-
Open the sidebar's Filter tab.
-
Click the Expand / Collapse toggle button of the Creator filter.
Up to 10 users that created processes are displayed. No user is selected by default. The number to the right of each filter indicates how many processes match this filter.
-
Do one of the following:
-
Select the check box(es) of the user(s) whose processes you want to display in the Process List.
-
Click the "show all" button, and in the break-out window that opens select the user(s) whose processes you want to display and click the Apply button.
The Process List is updated and shows only the processes of the selected user(s); processes created by other users are hidden.
-
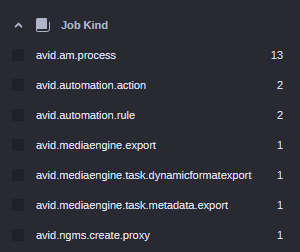
To apply a job kind based filter:
-
Open the sidebar's Filter tab.
-
Click the Expand / Collapse toggle button of the Job Kind filter.
Up to 10 job kinds are displayed. No job kind is selected by default. The number to the right of each filter indicates how many processes match this filter.
-
Do one of the following:
-
Select the check box(es) of the job kind(s) you want to display in the Process List.
-
Click the "show all" button, and in the break-out window that opens select the job kind(s) you want to display and click the Apply button.
The Process List is updated and shows only the processes of the selected job kind(s); other processes are hidden.
-
To apply a custom property filter:
-
Open the sidebar's Filter tab.
-
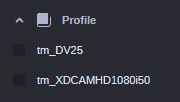
Click the Expand / Collapse toggle button of the custom property filter ( in the following illustration: Profile).
The values of the custom property are displayed. No value is selected by default.
-
(optional) Click the “show <number> more” link to expand the category within the sidebar and show all values.
-
Select the check box(es) of the value(s) that are to be used for filtering.
The Process List is updated and shows only the processes that contain the selected value(s).
To remove filters, do one of the following:
-
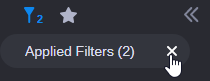
To remove all applied filters at the same time, click the X on the right of the Applied Filters button. The Filter list is reset and all filters are cleared from the Process List.
-
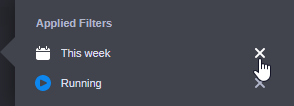
To remove an individual filter, click on the Applied Filters button, and in the fly-out window that provides more detail on the selected filters click the X to the right of any filter you want to remove. The filter is cleared from the Process List.