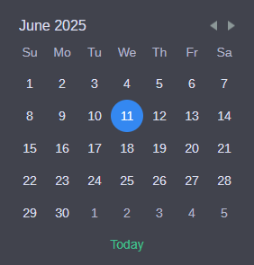
Calendar Picker
The Calendar Picker in the Acquire application displays the current month based on the system date of the host machine.
Time zone information is derived from the local machine, while the actual time is synchronized with the Cloud UX server. This may result in minor discrepancies. For example, if the Cloud UX server reports 05:11 UTC and the local system is set to UTC-3, the local clock may show 02:14, but Acquire will display 02:11.
The Calendar Picker is functionally relevant only in the Channels View (also referred to as the Timeline View), although it remains visible throughout the application interface.

To display the Calendar (if it is not visible), do one of the following:
-
Click the date in the upper left of the Acquire app (next to the Acquire logo).
-
Click the Calendar icon to the right of the date.
The Calendar displays approximately six weeks, depending on the number of weeks in the selected month. Past dates are visually distinguished by a darker background color compared to future dates.

Selecting a date in the Calendar updates the focus in the Channels View. Hovering over a date and then clicking a future date defines a date range, which is reflected in both the Calendar and the Channels View. When a date or range of dates is selected, the Channels View resets to match the selection. For example:
-
Selecting one day updates the view to a single day.
-
Selecting four days updates the view to a four-day span.
The maximum selectable range is seven (7) consecutive days. To select a range, hover over the starting date (which will be visually circled), then drag using the mouse wheel to extend the selection. The selected range is applied to the timeline display.
To view a different month, do one of the following:
-
Click the left arrow to view a previous month.
-
Click the right arrow to view a subsequent month.