Scheduling New Recordings
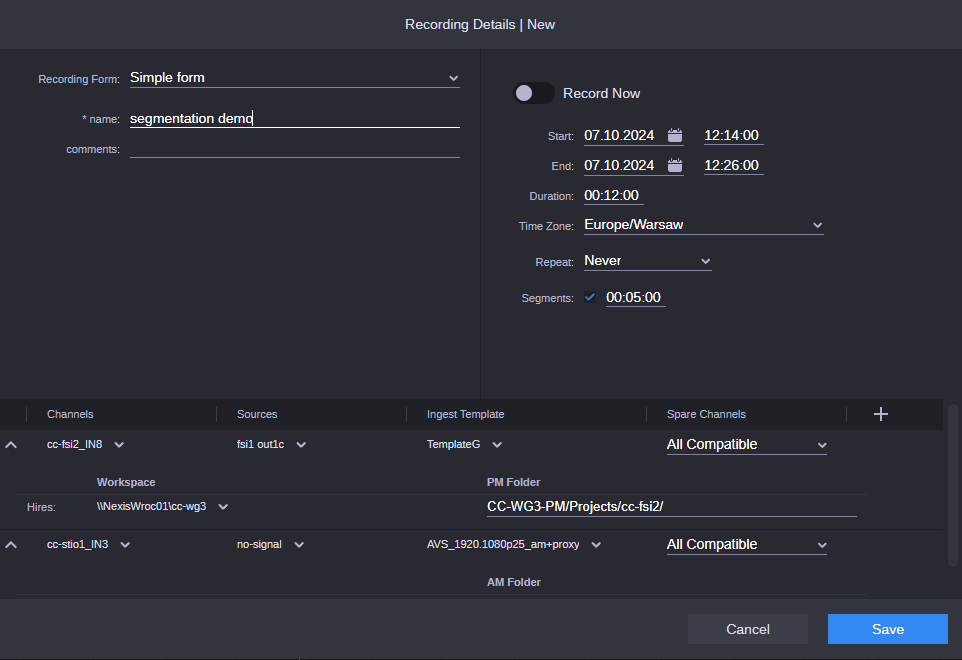
You can schedule new recording from the Recording Details | New window.
You can type special characters in any of the metadata fields inside the Recording Details | New window (Date, Time) by adding a "$" directly in the field. For more information, see Using Tokens with Acquire.
The metadata fields are determined during the Recording Form creation. For more information on creating and customizing forms, see "Working with the Acquire Form Builder" in the Avid MediaCentral | Cloud UX Installation Guide.
n When two recordings are triggered simultaneously, the system automatically adds a 3-second gap between them to prevent potential recording errors. This is expected behavior.
To schedule new recordings:
-
Do one of the following:
-
Click the New Recording button.
-
Select a specific channel, click the Schedule timeline at the time you want the recording to begin, right-click, and choose Create Recording.
The time you select for the recording must be in the future.
-
Double-click anywhere on the Schedule timeline, and later add the date and time you want the recording to occur.
Or, click the Schedule timeline anywhere in the future, right-click, and select Create Recording.
Again, the Start time of the recording must be in the future, or you will not be able to schedule the recording.
-
Click the New Recording button on the top right of the window.
-
-
In the Recording Form, select the metadata template to be used to create this recording. Avid ships Acquire with an Example form, which contains the Name and Comments attributes. However, administrators can use the Acquire Settings app to build new forms that can be customized to meet the needs of your individual organization.
n Changing the Recording Form will clear all your entered metadata. When switching back to a previously used form, the formerly entered data will not be preserved.
-
(Option) If you want to change the name of the folder where the recording will check in, you can select the folder using the PM/AM location picker. It allows you to select only the folder that exists at the moment of scheduling. This is a required field. So, a valid folder name must be displayed.
n If the PM folder or AM folder used by a scheduled recording is deleted, the asset may still be found using the Search App, but it will not appear in the Browse App. For the Production Management folder, the Acquire app will attempt to restore it. However, for Asset Management folders, restoration is not possible, and the asset will instead be placed in the default Asset Management ingest location.
-
(Option) If you want your recording to start now, click the Record Now toggle to turn it On. When you select the Record Now button, the Save button will be changed to Record instead of Start. When the recording starts, the Recording Editor window closes.
n With the exception of the Duration and the End fields, the remaining fields in the Schedule section gray out. Otherwise, leave the Record Now toggle turned Off to manually schedule the recording.
To specify the time zone, click the drop arrow in the Time Zone field, and select a new Time Zone from the list any time a new recording is created.
-
(Option) If you want to change the date or time of the recording, complete the following fields as necessary.
-
In the Start field, type a new start date and/or time for the recording. The date and time you select must be in the future, or the field will display a red line beneath it.
n When you change the start time, the time in the End field changes to match the duration.
-
In the End field, type a new end date and/or time for the recording.
n When you change the End field, the time in the Duration field changes to match the duration between the Start and End times.
-
In the Duration field, type a new duration for the recording.
n When you change the Duration field, the time in the End field changes to match the duration.
-
-
(Option) You can also specify the time zone in which the time should be displayed. The recording execution time is always reliable, and, the system converts everything to UTC.
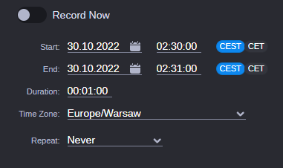
If the recording span crosses the Daylight Saving Time border, an additional field is displayed, allowing you to choose which time zone you want (summer-winter) or just to indicate which time zone it is (winter-summer).
-
In the Repeat field, if you want to repeat this recording, select the frequency by selecting the value from the drop-down list. (Every day, Every week, Every month).
-
If you select Every day, the End Repeating field appears.
If you select anything other than Never (e.g., On a Date, or After an Occurrence), additional fields display for you to provide the additional information to end the repeat, on a specific date, or after a certain number of occurrences.
-
If you select Every week, the days of the week appear.
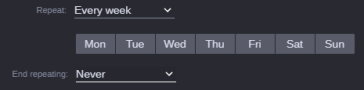
If you want to repeat this recording on specific days of the week (or every day), click the days of the week you want to repeat this recording and the day(s) will appear highlighted as shown below.
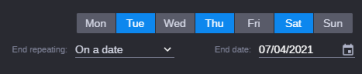
In the End repeating field, if you select On a Date, or After an Occurrence, additional fields display for you to provide the additional information to end the repeat, on a specific date, or after a certain number of occurrences.
-
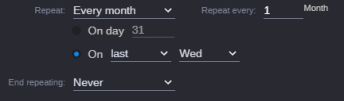
If you select Every month, additional fields appear.

In the Repeat every __ Month field, keep the default of 1 if you want this to repeat every month. Otherwise, change it to reflect the frequency (e.g., 2 for every two months, 3 for every three months, etc.).
Do one of the following:
-
If you want the recording to repeat on a specific day, click the On day radio button, and select the day of the month (1 to 31) that you want the recording to repeat.
-
If you want more specific scheduling (e.g., you want the recording to record on the last Wed of the month), click the On radio button, then select the appropriate check box (First, second, third, fourth, or last), followed by the day of the week (e.g., Wed).
In the End repeating field, if you select On a Date, or After an Occurrence, additional fields display for you to provide the additional information to end the repeat, on a specific date, or after a certain number of occurrences.
-
-
-
(Option) When the Segments option is enabled, Acquire attempts to segment the recording at the requested interval. The minimum duration of a segmentation interval is 5 minutes. However, it is possible to enable segmentation for recordings shorter than 5 minutes, since the recording duration can be extended at a later time (for example using the manipulation handles on the Channels View).
n Recording segmentation only works with Avid Stream IO channels. It is possible to enable the Segments option for new recordings on FastServe or MediaCentral Stream channels, but the segmentation feature will only work after adding an Avid Stream IO channel to this recording.
n When the Record Now toggle is switched on, the Segments option is disabled by default.
-
In the Target Configuration section, if you create a recording with no selection of a specific channel, you must add a channel, or edit the channel(s), source(s), ingest template, storage location, and Spare channels for your recording.

To complete the Targets configuration, do the following:
-
 To create a recording with no specific channel selected, you need to add a specific channel that you want this recording to record on. To add a new channel for this recording, click the + button. A new row appears showing a new channel.
 -
To change the recording channel, click the drop-down menu in the Channels field, and select a different channel.
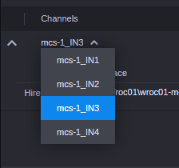
Each recording has a pointed Primary Channel. One channel can record only one signal (source) at a time.
-
To select or change the source for this recording, click the drop menu in the Sources field, and select the source you want for this recording.
-
To select or change the ingest template for this recording, click the drop menu in the Ingest Templates field, and select the ingest template you want for this recording.
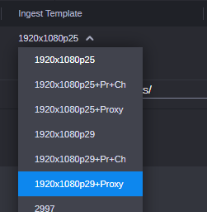
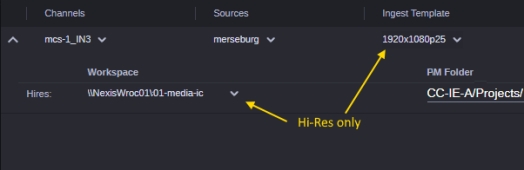
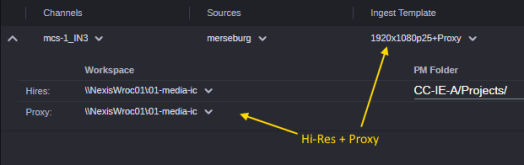
There are Ingest templates that record only Hi-Res content, but also those which have Hi-Res + Proxy. If the selected Ingest Template has a Proxy, you can select two different locations for media files, but because it is still one asset in Production Management or Asset Management, there is only one Production Management or Asset Management folder.
The following screen examples show both options (Hi-Res only, and Hi-Res and Proxy):
-
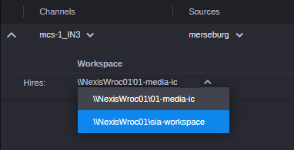
To select the workspace (storage location) where the Avid NEXIS will store the recording, in the Workspace field, select a new Avid NEXIS workspace from the drop menu. Depending on the selected template, there can be one or more drop-down lists to select workspace (an Avid NEXIS destination).
-
To select or change the Production Management location, in the PM field, select a new Production Management folder from the drop menu.
-
To select or change the Asset Management location, in the AM field, select a new Asset Management folder from the drop menu.
-
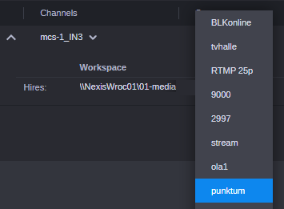
(Option) To add a spare channel for this recording in case of a failover, or change an existing spare channel for this recording, click the drop menu in the Spare Channel field, and select the spare channel to the one you want for this recording.
The list of spare channels is a result of two factors:
-
Channels compatibility
-
Administrator settings.
As a result, the list of available spare channels is defined for each channel. It may be empty or contain one or more items as shown in the following screen example.
You can use it as it is presented, or you can change it.

To edit the information for the new channel, repeat any relevant substeps in Step 11.
For more information on configuring spare channels, see the "Channel Profiles" section of the "Configuring Acquire System Settings" topic in the Avid MediaCentral | Cloud UX Installation Guide.
-
-
-
Click the Save button to save your changes and schedule the recording.
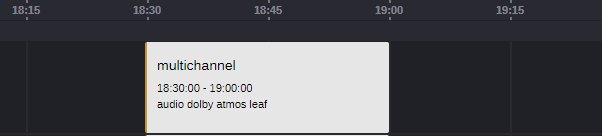
The recording will appear on the Schedule panel.