Using Closed Captions with Your Video Clips
Closed Captions can be ingested with the video (SRT file), or manually typed (or edited). They can also be generated manually or automatically (paying option).
Once closed captions are added to your video clip, they can be used in one of the following ways:
-
Export the Closed Caption file (such as WebVTT or SRT) to your CMS or OVP.
-
Download the closed caption file for use in other platforms.
-
Burn the closed captions on the video so they become “open” captions.
Difference Between Subtitles and Closed Captions
Subtitles are generally intended for viewers who can hear, but prefer to read what is spoken, or perhaps read what is spoken in an alternative language track. Subtitles are spoken words only.
Closed Captions, on the other hand, not only display the spoken words, but also indicate sounds like “crashing” or “clapping”, indicate there is music being played, etc. In most video players (like your TV) there is an option to enable or disable the displaying of the closed captions or subtitles.
If your video clip has embedded closed captions in either the EIA-608 or 708 formats, then the Publisher app can automatically ingest, and display these captions.
If you do not have embedded closed captions on your video clips, you have two other options.
-
When creating a clip, use the CC editor to manually type your captions. For more information, see Adding or Editing Subtitles (Closed Captions).
-
 Click on the CC button of the video player to enable the display of the closed captions being ingested from your video clip. Once enabled, the CC button turns blue. Click again to disable closed captions.
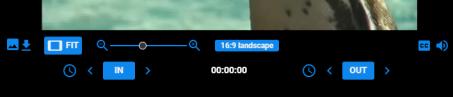
Subtitle (Closed Caption) Formatting
 The Edit Subtitle (Closed Caption) dialog box enables you to add new or edit existing subtitles. It can be accessed by clicking on the Edit subtitles button on the Editing toolbar.

The following fields on the Subtitle / Closed Captioning user interface are described below:
|
Icon |
Name |
Description |
|
|
Subtitle number |
Displays the incremental number of the subtitle. As more subtitles are added, the number increases by one. |
|
|
Play |
Plays the clip so that you can view the video content while you type your subtitle. |
|
|
Replay |
Replays the clip. |
|
|
Replay Slow |
Replays the clip in slow motion. |
|
|
Merge with Next Subtitle |
Enables you to merge the current subtitle with the next subtitle. |
|
|
Split at Cursor Position |
Enables you to split the subtitle at a position within the subtitle where you place your cursor. |
|
|
Begin / End |
Displays the beginning and ending timecode of the subtitle. |
|
|
Duration |
Displays the duration of the subtitle. |
|
|
Line / Characters |
Displays the line of the subtitle, and the number of characters contained in it. The C/L ratio shows the number of characters per line that is a useful indication for subtitle display. For some formats (e.g., WebVTT), above a definite value, the subtitles will be displayed on multiple lines. The C/L ratio can indicate when another line is displayed, but it depends on the subtitles format. n A specific subtitle format can be configured by your System Administrator in the SAAS platform, which then can be used to burn subtitles in the video. |
|
|
Characters per Second |
Displays the number of characters per second in the subtitle line. n This value can help the editor that writes subtitles to input a sentence with a comfortable length. In fact, it has been demonstrated that a user can easily read under a value below 12, and can have some difficulties for values between 12 and 16. Above 16, the user will most likely not read the subtitle completely. |
|
|
Add Subtitle |
Click to add another subtitle. For more information, see Adding or Editing Subtitles (Closed Captions). |
Adding or Editing Subtitles (Closed Captions)
You can add or edit subtitles to video clips using the CC Edit icon at the top of the video playback window. This includes typing all the captions, or just correcting existing captions text.
To add or edit subtitles:
-
 Click the Edit Subtitle icon in the Editing toolbar.
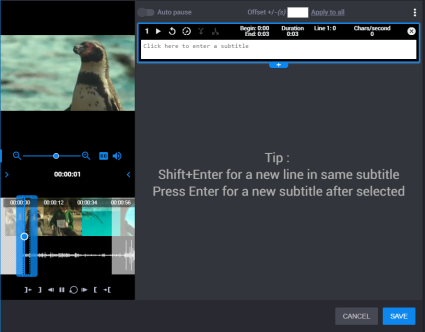
The Add Subtitle dialog box opens, and the video starts playing.
-
Click on the text of any segment to edit the text.
n If there are embedded captions in your stream, they will be displayed in the timing segments in the CC Editor.
n If there are no embedded captions, you can add captions in timed segments by clicking in the box to enter a new subtitle.
-
 (Option) If you are manually typing captions, click the “+” icon to add a new segment, or press Enter on your keyboard.
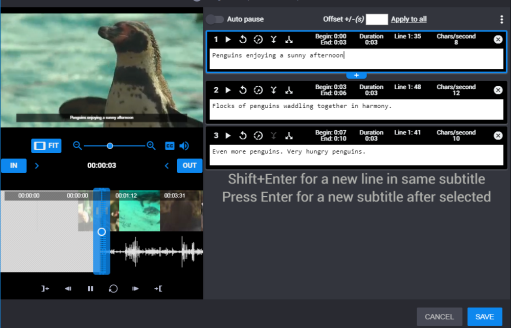
-
Follow the instructions on the screen.
-
 Click the Save button to save your changes.
Publishing with Closed Captions
If you export your clip to a CMS, OVP or social media platform that supports CC (Like YouTube and Facebook), then the sidecar file (like SRT or WebVTT) is automatically sent. If you prefer to have the captions “burned” into the video, then select the option for the specific destination you want the captions burned.
Publish Templates can specify the desired action for a specific destination. For example, you can set a Twitter account to get Burned CC with a specific style, another TW account to get a “clean” video, Facebook to get a sidecar file and your CMS to get a WebVTT file. Selecting the Publish Template for a clip will automatically apply the desired settings.
Selecting the Publish Template for a clip will automatically apply the desired settings.
n You can send a “clean” version without the captions burned to some destinations while having the “burned” version sent to others.
To publish with Closed Captions:
-
In the Clip Publishing details, click to expand the details for a specific destination.
The Image Selector window opens.
-
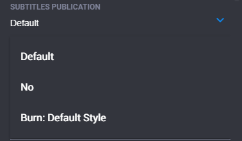
In the Subtitles Publication field, select one of the following options:
-
Default - Leave the value to default to send the SRT file to the destination, if that destination supports it.
-
No - Select No, to publish the video without subtitles or closed captions.
-
Burn: Default Style - Select one of the predefined Closed Caption options. There might additional closed captions “Styles” to choose from (e.g., Decorators tab > Subtitles option). You can also create your own. For more information, see Defining Closed Caption Options.
-
-
Once the clip is published, the desired Closed Caption option will be applied to each destination.
Defining Closed Caption Options
You can define you own Closed Caption styles.
To define Closed Caption options:
-
Navigate to the Clip Management tab.
-
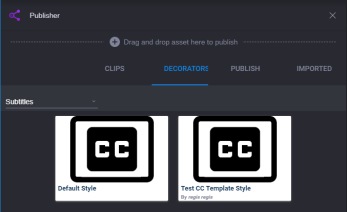
Click the tab for Decorators, then select the Subtitles option from the menu on the left to display only subtitles.
The available Subtitle styles (e.g., Default Style) appear.

-
Click the subtitle that you want to modify.
The available Subtitle styles (e.g., Default Style) appear.

-
In the Dynamic Overlay field, type the new name of the Template over the existing name. This will create a copy of the original Default Style Template which will be intact when you save the new one.
-
Modify the styles of the new template as you wish.
-
Click Save.
The new style you created (e.g., Text CC Template Style) appears in the Subtitles page of the Decorator tab.