Recording Details | New Window
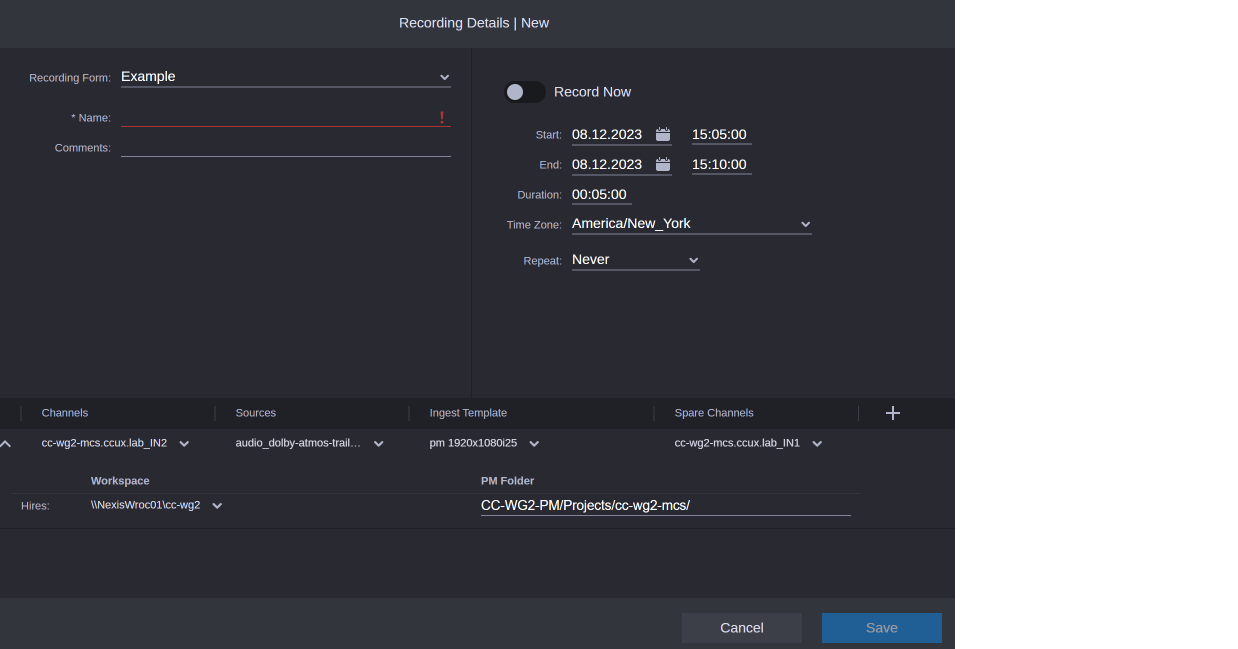
The Recording Details | New window is where you can schedule a new recording. The window provides a visual display of the information regarding a recording, including the name, folder location, and date and time of the recording.
n The New Recording button is enabled only for Acquire administrators and editors. Acquire viewers cannot access this feature.
The Recording Details | New window is comprised of three main sections:
-
The Metadata section - where you can select a template (Recording Form)and enter custom metadata for the new recording. Only recording forms available to you are shown, and if a default form is set by the administrator, it will be pre-selected for you. For more information about these recordings forms, see "Working with the Acquire Forms" in the MediaCentral | Cloud UX Installation Guide.
n Switching forms will reset all previously entered data.
-
The Schedule section - where you define when the recording should happen.
-
The Target Configuration section - where you define the recording's targets.
You can add additional information as needed, and then save the recording. Once saved it will appear on the Schedule timeline.
The Content Management folder in Production Management or Asset Management is not the same as file location folder in Avid NEXIS/SMB. The file location is determined by selecting the Avid NEXIS Workspace (if applicable) and the path specified inside of the Ingest template. The folder in the Acquire app is a folder in the logical structure managed by Production Management or Asset Management.
It is important to note that the Recording Details window may be opened from more than one place, and the state of the user interface might be different. It determines what data is pre-set in the window.
The Recording Details | New window opens.
For more information, see Scheduling New Recordings
Buttons
Buttons on the Schedule timeline include the following:
|
Button Icon |
Name of Button |
Description |
|
|
Goto Now or Clock |
This button is used to bring the blue current time indicator into view one time. |
|
|
Follow Clock (Gray) |
Clicking the Follow Clock (or Lock) icon when it’s blue turns the icon gray, and allows the blue Current time indicator to move with the current time on the Schedule panel. Drag in the timecode to release the lock, or click the gray Follow Clock icon again. |
|
|
Follow Clock (Blue) |
Clicking the Follow Clock (or Lock) icon when it’s gray turns the icon blue and keeps the blue Current time indicator visible on the Schedule panel. It follows the current now time. Drag in the timecode to release the lock, or click the blue Follow Clock icon again. |
