Creating Transcript for Selected Audio Tracks
For
-
Create
-
Re-create the
c If a re-
c Triggering
The workflow for both use cases is quite the same, as described in the following procedure. Note that the Create New
To create
-
Open an asset in the Transcript tab.
-

The first available transcript is shown. The transcript selection in the Transcript tab toolbar shows all completed, failed or currently being created transcripts of the asset.
-
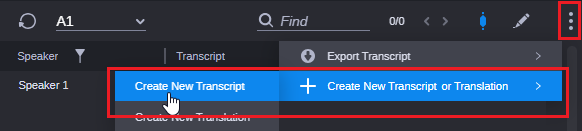
 Click the Create New Transcript or Translation button in the Transcript tab toolbar and then select Create New
 If the button is not shown, click the More Options button and select Create New Transcript or Translation > Create New
The
-
(optional) Enter a name for the transcript to be created in the Transcript Name field.
If you do not enter a name, the audio track name is used as transcript name.
-
Select the track(s) for which a transcript is to be generated from the Audio Track list.
The Audio Track list shows the audio tracks of the asset.
n If you select more than one audio track, the tracks will be mixed down into one track and a transcript for the mixed down audio track is created. For example, if you select A1 and A2, a mixed down transcript for A1-A2 is created. If you want to create separate transcripts for A1 and A2, first create the transcript for A1, then for A2.
-
Click the
The dialog box is closed and the
If a selected
-
"The transcript for this channel(s) is already completed, would you like to re-transcribe?"
-
"The transcript for this channel(s) is in progress, would you like to re-transcribe?"
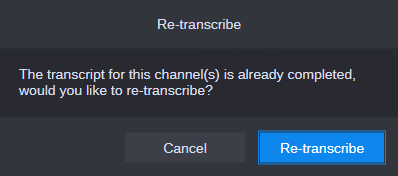
Do one of the following:
-
Click Cancel to keep the already existing
-
Click Re-
-
-
Select the
The view does not automatically switch to another
Example: Transcript A1 was shown in the Transcript tab when you triggered transcript creation for track A2; the Transcript tab will not automatically switch to A2 but keeps on showing transcript A1. You need to select A2 from the transcript selection.
-
(optional) Open the Process app and monitor the
-
Wait until the
-
For non-growing clips that are shorter than 1 hour, the fully created transcript is shown. Once the transcribe job has completed, the Transcript tab display auto-refreshes and all transcript segments are automatically shown.
If the transcribe job fails before completion, the Transcription in progress message will be replaced by the Transcription failed message.
-
When a transcript is created for a growing (EWC) clip or a non-growing clip that is longer than 1 hour, the Transcript tab display auto-refreshes, new portions of the transcript are automatically shown. As long as the transcript creation is not finished, the shown transcript segments are in read-only mode. When the transcript creation is finished, the Transcript tab auto-refreshes and enables editing of the transcript.
If the transcribe job fails before completion, a message "The transcript creation failed" is shown for a short period of time on the Fast bar, and a warning icon is displayed between the transcript selector and Find control on the toolbar. Its tool-tip reads "Transcription error: partial transcript only". Already displayed portions of the transcript are kept and can be edited.
-